Hi all. Thought I would give a long overdue update on this blog. It has been over 3 years since I last posted anything and can't see me coming back to regular writing in the near future, although I would like to eventually. I have had a lot going on with work and my home life and the largest of these is the arrival of my newest addition to the family, my son! He arrived in March 2 years ago but the build up to his arrival was a stressful time with my wife developing sciatica! Thankfully both he and my wife where both fine and so we now have a boy and a girl so I think that is the family complete.
My Bees are still buzzing away although I now only have the top bar hive with Bees in at the moment. This is due to having to move site again and therefore haven't had a chance to increase my numbers. The lady who's land it is though is very keen on me increasing my numbers; I think she wants more honey! Who can blame her.
I have almost stopped with home brewing but this is more due to my son. He won't let me (or anyone) do anything without getting involved. A minor inconvenience would be a huge understatement when it comes to doing anything with him about. With Lauren I could get almost anything done and she would be fine staying out of my way. We didn't know how easy we had it until he came along! We do love him dearly but sometimes he is just far to independent for a 2 year old. It's times when he goes and gets the eggs from the cupboard and then gets a pan out, takes it to the sink and then fills it with water, takes it to the cooker and tries to turn it on!! We watch him for a while but he gets soooooo angry when we stop him!
Anyway I think that will cove it for an update for now. I will aim to write more posts but can't promise. I have a better camera on my phone so there is potential for some good photos and videos when I do return on a more regular basis.
Showing posts with label Homebrewing. Show all posts
Showing posts with label Homebrewing. Show all posts
Friday, 12 May 2017


Monday, 5 May 2014
Cider!
Last year I aquired a huge batch of apples and made cider. Below are the photos I took of the process


 |
| This is the original batch of apples collected while walking on common |
| apples a bit of a clean in cold water |
 |
| Me grating up 25kg of apples in a food processor, a sticky job! |
 |
| The grated apple put into the press and starting to squeeze out the juice |
 |
| Pulp |
 |
| Juice! |
 |
| All setup |
 |
| The first dry apple cake. These were returned to my friend to feed to his pigs |
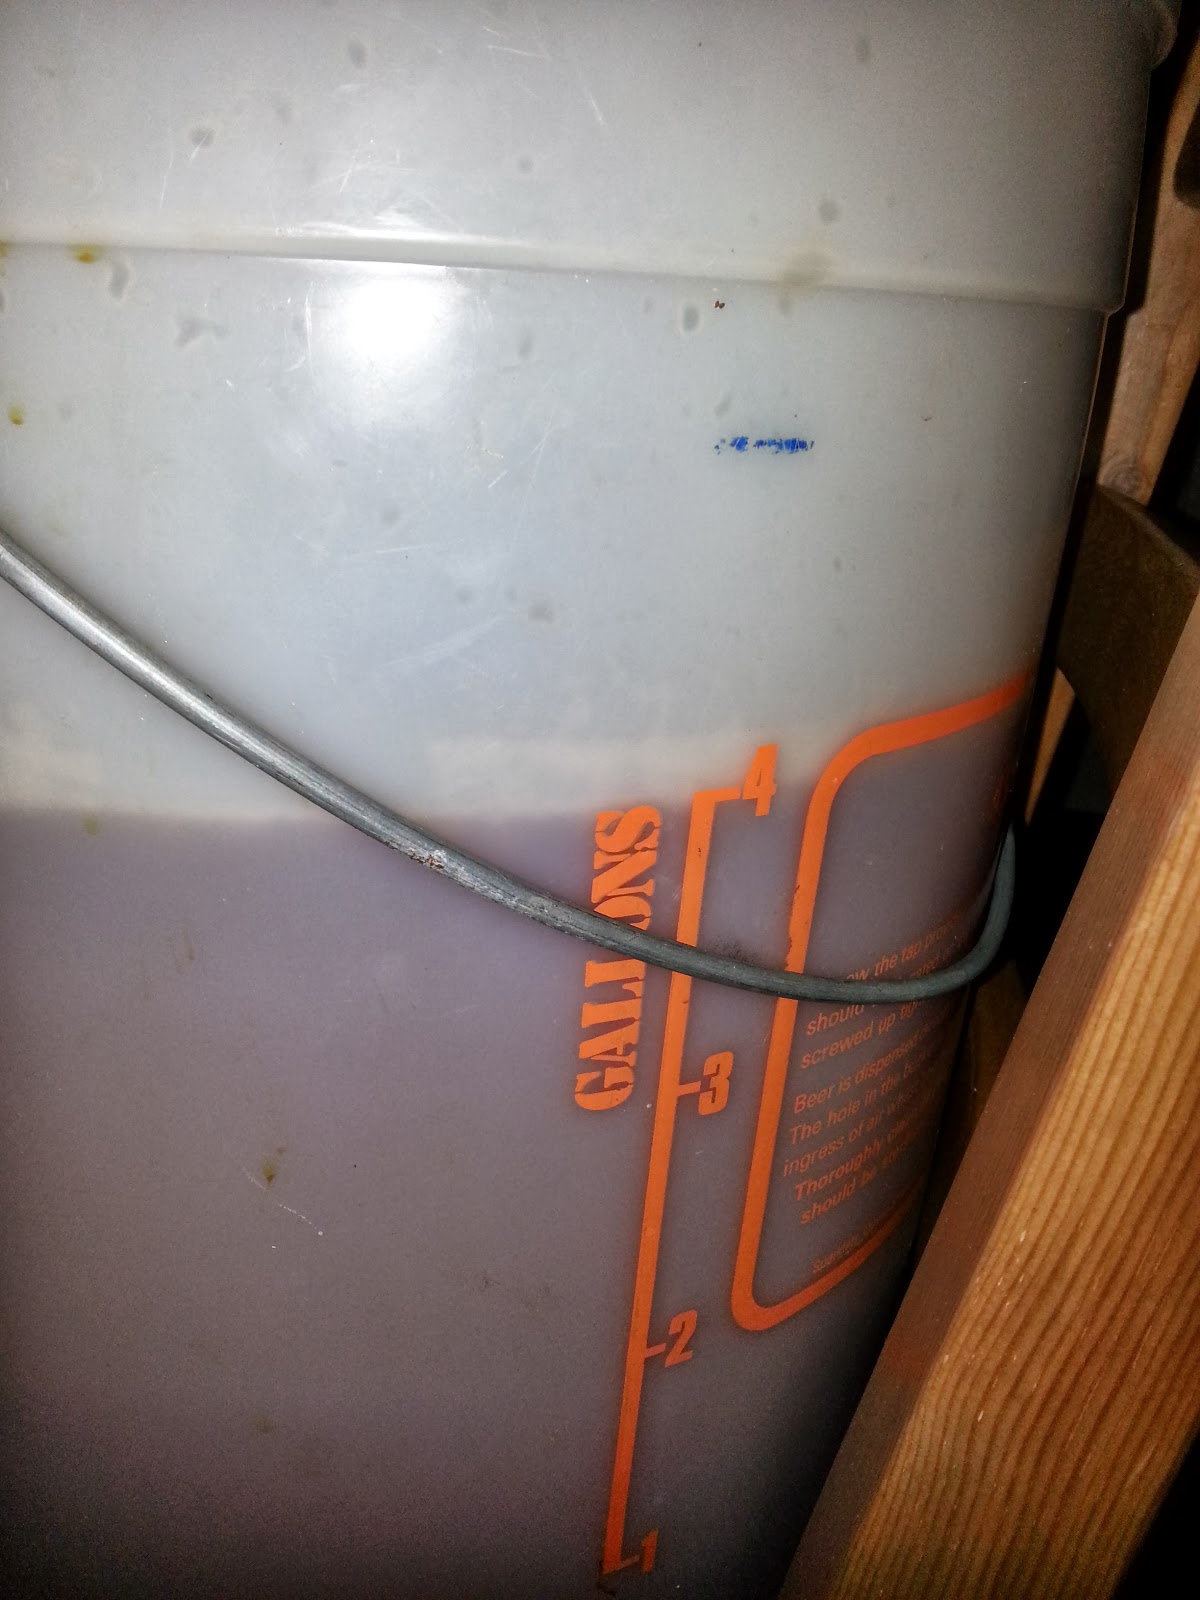 |
| 4 Gallons of juice |
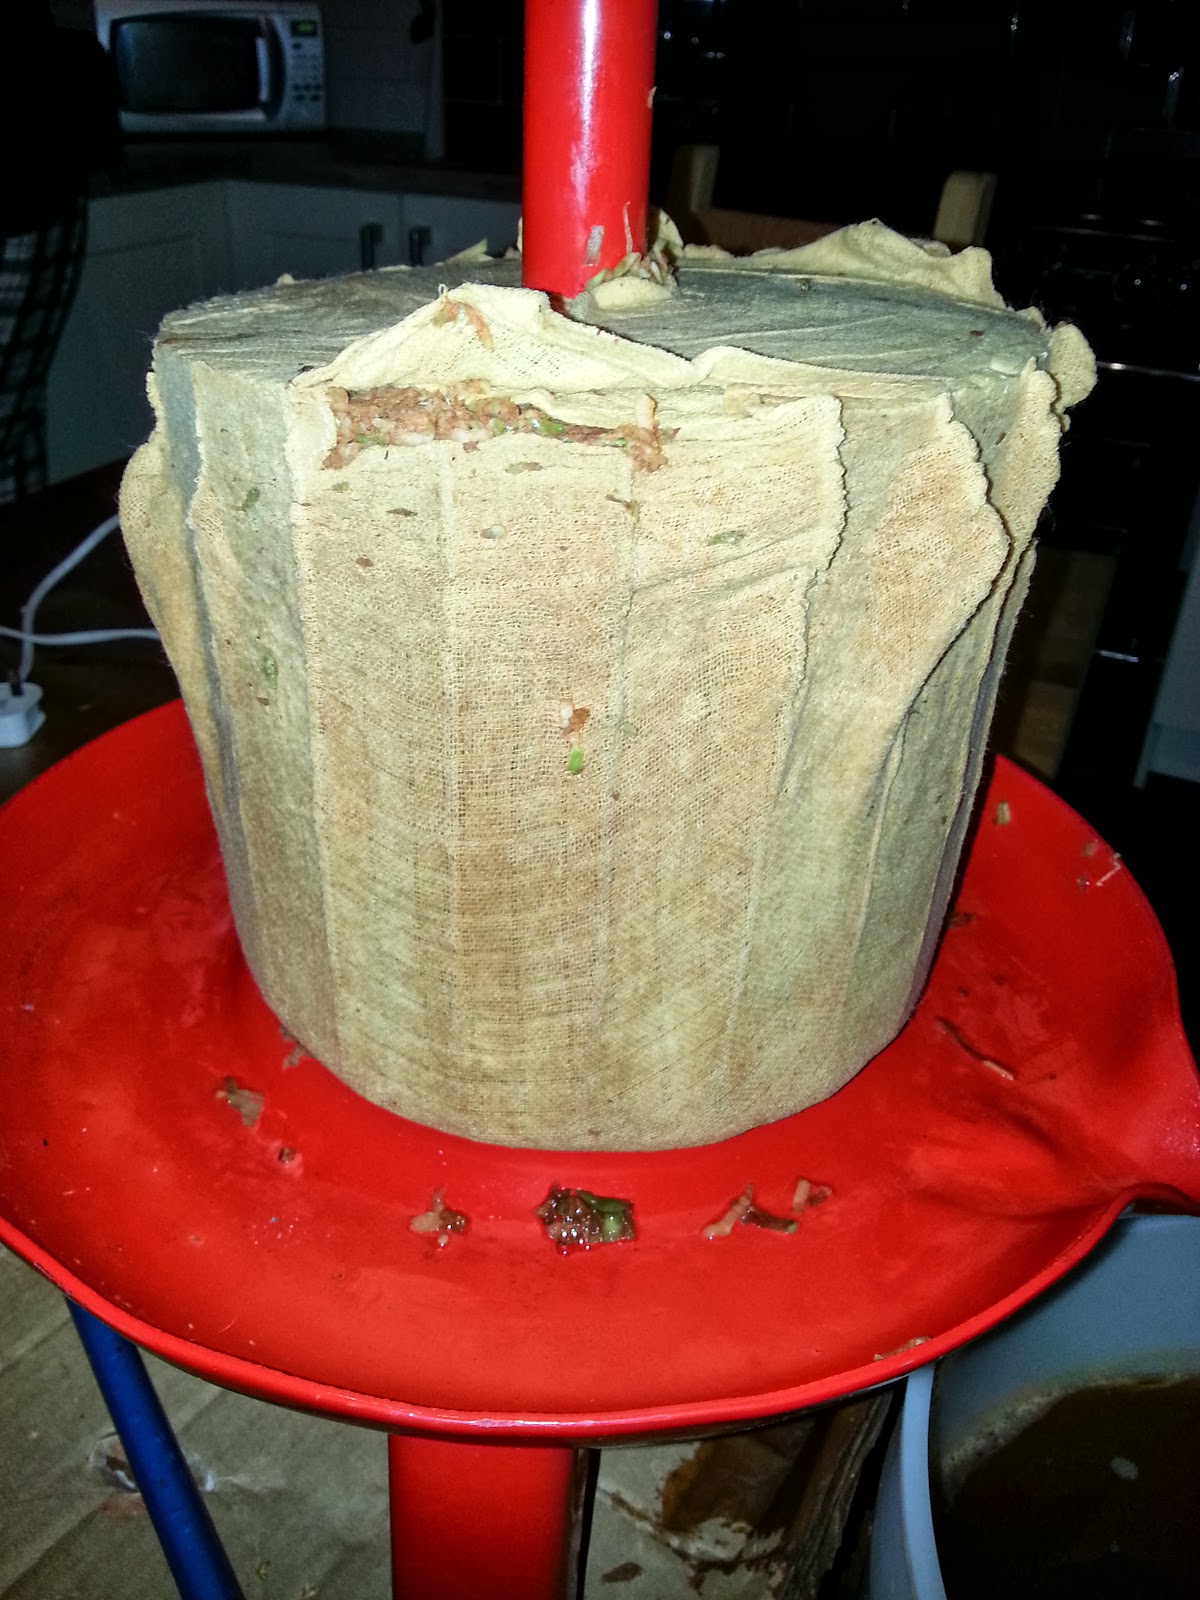 |
| The dried cake after pressing |
 |
| More pig food |
 |
| No yeast, water or sugar added, just let the natural yeast do their thing! |
 |
| Monitoring the gravity to see when ready |
 |
| Fermenting nicely! |
After it had fermented away it was all bottled and is now in storage while it ages. I have drank a few bottles of it and although Steph isn't a fan I am quite enjoying it. Credit to Steph though as she did help me a lot with the process.
Monday, 30 September 2013
Apples, Plums and Wine Tasting
The last few weeks have been a bit hectic for me and Steph. For one reason or another we have had a lot of time together and have kept ourselves busy. One thing we've been making will have to wait a while (until after Christmas) before I do a post about it, sounds intriguing! I will write about what I've been doing this week in reverse order.
Earlier today I dropped Steph off at work, we are down to one car at the moment due to a faulty clutch, and then headed over to one of my good friends house with the intention of going for a walk. I took my foraging bag with me just in case I saw any elderberries or sloes for making wine. We did see plenty of elderberries but they were generally a little too high to reach or through some brambles so we didn't collect any. I was keeping an eye out for the sloes but 3 1/2 miles into the walk and we hadn't seen any. I was starting to feel hungry at this point and as I was walking I saw some windfall apples on the floor. At the side of the path was an apple tree with small red shiny apples. Me and my friend tried one and they were nice and sweet so we started to fill our bags. When I worked my way to the back of the tree I saw that there was another apple tree... And another, and another! In fact there were around seven trees altogether, not all had apples on them but most did. Within about 15 minutes I'd picked enough to fill my bag and eaten about 4 different varieties! My intention is to have a go at making some cider with this 5kg of apples. My friend who supplied me with the Bees earlier in the year is going to lend me a cider press, if you're reading this I thank you again in advance!


Earlier today I dropped Steph off at work, we are down to one car at the moment due to a faulty clutch, and then headed over to one of my good friends house with the intention of going for a walk. I took my foraging bag with me just in case I saw any elderberries or sloes for making wine. We did see plenty of elderberries but they were generally a little too high to reach or through some brambles so we didn't collect any. I was keeping an eye out for the sloes but 3 1/2 miles into the walk and we hadn't seen any. I was starting to feel hungry at this point and as I was walking I saw some windfall apples on the floor. At the side of the path was an apple tree with small red shiny apples. Me and my friend tried one and they were nice and sweet so we started to fill our bags. When I worked my way to the back of the tree I saw that there was another apple tree... And another, and another! In fact there were around seven trees altogether, not all had apples on them but most did. Within about 15 minutes I'd picked enough to fill my bag and eaten about 4 different varieties! My intention is to have a go at making some cider with this 5kg of apples. My friend who supplied me with the Bees earlier in the year is going to lend me a cider press, if you're reading this I thank you again in advance!
Last night I had a different friend around my house and we did some wine tasting. We started on some elderberry wine that was bottled a long while ago. The last time I tasted this wine it was a little rough but now it seems to have matured nicely and in a few more months I think it will be lovely, if it lasts that long! It's a shame I haven't had time to pick any elderberries this year. Next we moved onto some rhubarb wine that I made this year. It hasn't had ages to mature but was still lovely and also rocket fuel! I only had a few glasses and I could really feel the effects, especially the following morning!
The last section is all about plums! Again I have to thank my friend for this; my dad's plum tree didn't survive moving allotments so we didn't have any this year but Mark let me take as many as I wanted. Within half an hour picking them I'd filled a carrier bag to the point of breaking! I had enough to make a batch of wine and several jars of jam. The best thing about the plums was that there wasn't even a single grub in any of them, when we have made plum jam before we usually see a grub in at least every 10. One thing I noticed when picking the fruit was that there were a lot of Bees on the fruit. At first I thought they were wasps but looking at them they were defiantly Bees. I've not come across Bees on fruit before.
Sunday, 23 June 2013
I'm Back!
After quite a long hiatus I have returned to the blogging world. It's not like I haven't had anything to blog about, on the contrary, I have had lots to write about but due to the time lapsed I think it would be better to bring you up to date with a summary. First off I will give an explanation to my lapse in writing. There were a few factors but firstly was ill health which I will say little of other than our toilet roll expenditure went up somewhat for a period. Then when all was settling down in the bowel department I was hit hard with the loss of a close friend. Along with me loosing my Bees and 3 out of our 5 chickens dying in quick succession I have just not felt like writing. Now I feel like enough time has passed and the amount I need to blog about has built up so I have lots to catch up on.
Anyway onto the summary. I have started a few new batches of wine, 2 made with dandelion, 1 with rhubarb and then a week or two later I made another batch with rhubarb. The dandelion wines are slightly different from one another as I have used red grape juice in one and white grape juice in the other. The recipe is here in the comments section of a previous post. I will write it up eventually and add it to the recipe page (eventually being the operative word). The batches of rhubarb wine are both the same recipe, the only difference is the size of the batch, the first is only 1 gallon but the second batch is 5 gallons! Keeping on the theme of wine I have also bottled 2 gallons of elderberry wine and started drinking it. I'm sure it'll taste better when it has aged more but at the moment it is drinkable and the further down the bottle I got the easier it was to drink although I had a headache at the end!
The land my Dad recently acquired is coming on nicely with more than a little help from my brother in law Lee, although in truth my Dad has done more work than should be expected of a 65 year old! He is a Yorkshire man though so a bit of hard graft doesn't scare him. I have mucked in as much as I've been able to, but due to there being no toilet down there I had a long period where I didn't dare go down there! Between us we have moved loads of clay and exposed the workable land beneath, then covered it in manure in preparation for next year. There is still loads to do down there and now the weather has improved it has got a bit overgrown in a lot of areas but we are working on it a bit at a time and large areas are covered with old carpets for the time being to keep the weeds down. All the trees that were moved down there are coming along nicely but won't produce much fruit this year. This is of little concern, the main thing is that they have plenty of leaves and are putting out new growth. With any luck next year will be a bumper crop!
I never got round to writing up about the last Wakefield and Pontefract Beekeepers Association meeting and now can't remember enough to do it justice. The main subject was on the Warre hive which is a form of top bar hive that involves making tall stack of boxes. One of the big differences with the style of Beekeeping is that rather than adding boxes to the top for the Bees to store honey in you add boxes underneath and the Bees move their brood rearing area down and start storing honey above; this has the advantage that it means the brood is always built on new comb. I may do a more detailed blog about the Warre hive at some point but as my knowledge on the subject is limited I may wait until I know more.
To finish off I will just mention one small last thing....... I have bought a new colony of Bees!!!! Ok, so it is more than a small thing, rather large to be honest and as this post has reached a fair length I will write a separate post for the new Bees!
Anyway onto the summary. I have started a few new batches of wine, 2 made with dandelion, 1 with rhubarb and then a week or two later I made another batch with rhubarb. The dandelion wines are slightly different from one another as I have used red grape juice in one and white grape juice in the other. The recipe is here in the comments section of a previous post. I will write it up eventually and add it to the recipe page (eventually being the operative word). The batches of rhubarb wine are both the same recipe, the only difference is the size of the batch, the first is only 1 gallon but the second batch is 5 gallons! Keeping on the theme of wine I have also bottled 2 gallons of elderberry wine and started drinking it. I'm sure it'll taste better when it has aged more but at the moment it is drinkable and the further down the bottle I got the easier it was to drink although I had a headache at the end!
The land my Dad recently acquired is coming on nicely with more than a little help from my brother in law Lee, although in truth my Dad has done more work than should be expected of a 65 year old! He is a Yorkshire man though so a bit of hard graft doesn't scare him. I have mucked in as much as I've been able to, but due to there being no toilet down there I had a long period where I didn't dare go down there! Between us we have moved loads of clay and exposed the workable land beneath, then covered it in manure in preparation for next year. There is still loads to do down there and now the weather has improved it has got a bit overgrown in a lot of areas but we are working on it a bit at a time and large areas are covered with old carpets for the time being to keep the weeds down. All the trees that were moved down there are coming along nicely but won't produce much fruit this year. This is of little concern, the main thing is that they have plenty of leaves and are putting out new growth. With any luck next year will be a bumper crop!
I never got round to writing up about the last Wakefield and Pontefract Beekeepers Association meeting and now can't remember enough to do it justice. The main subject was on the Warre hive which is a form of top bar hive that involves making tall stack of boxes. One of the big differences with the style of Beekeeping is that rather than adding boxes to the top for the Bees to store honey in you add boxes underneath and the Bees move their brood rearing area down and start storing honey above; this has the advantage that it means the brood is always built on new comb. I may do a more detailed blog about the Warre hive at some point but as my knowledge on the subject is limited I may wait until I know more.
To finish off I will just mention one small last thing....... I have bought a new colony of Bees!!!! Ok, so it is more than a small thing, rather large to be honest and as this post has reached a fair length I will write a separate post for the new Bees!
Friday, 14 September 2012
A Buzz About Life
This may come as a bit of a surprise, especially to those who know me, but I'm getting a little bored with how my posts are going. Basically there is only so much I can say about the same thing; For example my weekly hive inspections when everything goes good and nothing out of the normal happens, they always sound more or less the same. Also when I'm making a home brew beer kit, they are the same procedure each time.
So what am I going to do about it? I'm certainly not going to stop writing as I really enjoy doing so. However I have decided to broaden the subject matter somewhat and rebrand my blog. As the title suggests my new name for the blog will probably be "A Buzz About Life" and will now include home baking, veg growing and possibly a few mentions of the chickens and anything else that relates to our version of "The good life". By doing this it will also allow Steph to get more involved as she does most of the baking (at least the successful baking!), and technically the chickens are hers anyway. This will also allow for more photos as well.
Does this mean I won't be posting about the Bees as much? The answer is no, the volume of Bee (and brewing) posts should stay the same, however the contents of the posts will be reduced to just include a quick summary. If I'm doing anything new or more complex then I will probably post as before. I hope this doesn't put anybody off reading but hopefully this will involve my family more and for those who don't know me in person will get to know more about me. By the time you are reading this post some of the visual changes to the layout may have happened but if not then they are coming soon.
So what am I going to do about it? I'm certainly not going to stop writing as I really enjoy doing so. However I have decided to broaden the subject matter somewhat and rebrand my blog. As the title suggests my new name for the blog will probably be "A Buzz About Life" and will now include home baking, veg growing and possibly a few mentions of the chickens and anything else that relates to our version of "The good life". By doing this it will also allow Steph to get more involved as she does most of the baking (at least the successful baking!), and technically the chickens are hers anyway. This will also allow for more photos as well.
Does this mean I won't be posting about the Bees as much? The answer is no, the volume of Bee (and brewing) posts should stay the same, however the contents of the posts will be reduced to just include a quick summary. If I'm doing anything new or more complex then I will probably post as before. I hope this doesn't put anybody off reading but hopefully this will involve my family more and for those who don't know me in person will get to know more about me. By the time you are reading this post some of the visual changes to the layout may have happened but if not then they are coming soon.
Wednesday, 4 July 2012
Elderflower Wine - My 100th Post!
I'll start of by giving a quick mention to this being my 100th post. When I started this blog I never expected to actually be still going this long. My expectation would be that I would get bored of it quickly and just use it as a tool for logging my beekeeping rather than writing it in a note book! It has actually turned out to be so much more. In the couple of years I have been blogging I have met new friends through other bloggers and extended the subject range to include home brewing and also increased my writing skills although I still rely heavily on my proof reader and wife, Steph, who is also now an author for this blog. There has been a few time when I have said I will just write a quick blog and ended up writing a several hundred word essay so I will change the subject now and start the real post which is about wine!
In the last few weeks the elderberry trees in the area have started producing their flowers so me and Steph decided it would be a good time to go out and collect the flowers to make some wine with! In just one short walk near some farm land where we live we managed to pick nearly a full carrier bag full of the flower heads. We made sure we left plenty of flower heads on the trees as later on in the year we will probably try to make some elderberry wine as well! The recipe I'm following for elderflower wine can be found here. In the recipe it gives measurements for making either 1 gallon or 5, I am just going to make 1 on this occasion. Below is the list of ingredients copied direct from the website.
After the walk I spread the flower heads on the table at home and left them a couple of hours to let any bugs make their own way off the flowers. When I came back I could see loads of tiny bugs on my brand new kitchen window, I imagine they were from the elderflowers!


In the last few weeks the elderberry trees in the area have started producing their flowers so me and Steph decided it would be a good time to go out and collect the flowers to make some wine with! In just one short walk near some farm land where we live we managed to pick nearly a full carrier bag full of the flower heads. We made sure we left plenty of flower heads on the trees as later on in the year we will probably try to make some elderberry wine as well! The recipe I'm following for elderflower wine can be found here. In the recipe it gives measurements for making either 1 gallon or 5, I am just going to make 1 on this occasion. Below is the list of ingredients copied direct from the website.
The quantities below are for 5 gallons, with the quantities for 1 gallon brews given in brackets.
- 110 heads of elderflowers (24 heads)
- 1kg of sultanas (200g)
- 75g of citric acid (15g)
- 375ml strong black tea (75ml)
- Wine yeast compound (or yeast nutrient and yeast) as per packet instructions
- 5.5kg granulated sugar (1.1kg)
- Stopper/stabiliser powder
 |
The recipe says to use 24 heads that should be approx 1 pint of flowers when they are trimmed from their stalks. I didn't bother to count the heads and just measured out a pint of heads. With the amount of flower heads I had collected there was enough for the batch I'm making leaving 2 pints that I bagged up individually and have popped in the freezer for later.
After I had chopped up the sultanas and weighed out the sugar and citric acid I placed them all in a large bowl with the pint of elderflowers and the tea. I then poured 2 pints of boiling water over it all then covered with a tight covering of clingfilm and forgot about it until the next day.
The next day I added the yeast and yeast nutrient and another couple of pints of water, this time cold water. I then covered it up and left it for 4 days. Each day I opened it a small amount and gave it a small stir.
After 5 days in total I poured the mixture into a demijohn using a sterile washing cloth to filter the debris off, then topped the liquid up to a gallon with cold water. At this stage it had a very inviting smell developing. When I checked it later the airlock was bubbling away nicely. I will now leave it to clear and rack the wine a couple of times and it should be ready for Christmas (which is only 173 days away) but will taste best if left until next summer!
Sunday, 17 June 2012
Ginger Ale!
Over the last few weeks me and my good wife, Steph, have been enjoying fresh, ice cold, tangy ginger ale and I am now going to share how easy and quick it is to make.
First off a list of ingredients. This is for making a 2 litre batch but can be scaled up or down if you want, the most important thing is to use plastic bottles to make your ale, I'll explain why later.
An empty 2 litre PLASTIC pop bottle
1 Lemon
Approx 1 inch of ginger (more if you like it strong)
2 Cups of sugar (or 400g)
1 Packet of bread yeast
If you are making bigger batches it's easy, just use 1 cup of sugar per litre, or 200 grams if you don't have cup measures. If only increasing to 3 or 4 litres then I don't think you need any more yeast but you will need to use more ginger and lemon. That is why I zest my lemon as well as juicing it as I use 3 litre bottles but you can still zest it if only doing 2 litres, if you are making 4 litres then I would use 2 lemons. This is a good recipe but once made do feel free to experiment and alter the quantities to suit you, I like to add a lot more ginger to make it really strong, just be careful when opening and ALWAYS USE PLASTIC BOTTLES!
...and that's it. Now to the method, which again is really simple!
First off a list of ingredients. This is for making a 2 litre batch but can be scaled up or down if you want, the most important thing is to use plastic bottles to make your ale, I'll explain why later.
An empty 2 litre PLASTIC pop bottle
1 Lemon
Approx 1 inch of ginger (more if you like it strong)
2 Cups of sugar (or 400g)
1 Packet of bread yeast
If you are making bigger batches it's easy, just use 1 cup of sugar per litre, or 200 grams if you don't have cup measures. If only increasing to 3 or 4 litres then I don't think you need any more yeast but you will need to use more ginger and lemon. That is why I zest my lemon as well as juicing it as I use 3 litre bottles but you can still zest it if only doing 2 litres, if you are making 4 litres then I would use 2 lemons. This is a good recipe but once made do feel free to experiment and alter the quantities to suit you, I like to add a lot more ginger to make it really strong, just be careful when opening and ALWAYS USE PLASTIC BOTTLES!
...and that's it. Now to the method, which again is really simple!
- The first thing to do is wash out an empty 2 litre plastic pop bottle . Once that has been cleaned and thoroughly rinsed out you can put all your dry ingredients in, which are the sugar and the yeast; if you have funnel this is easier.
- Grate the ginger into a measuring jug or bowl using the finest grater that you have, I don't think it makes too much difference if you just have the regular large grater used for cheese! I used the grater to also grate some zest from the lemon in as well but this is optional. If you have lots of ginger stuck to the grater then you can rinse it gently under the tap collecting the liquid that runs off in your jug or bowl.
- Juice the lemon and add the juice (but no seeds!) to the bowl of grated ginger, this should now be a gingery lemony slurry! This is now added to the pop bottle. Again a funnel comes in handy but if you have used a lot of ginger it tends to clog up the funnel so a skewer or something similar is useful for helping it through!
- Top up the bottle with cold water leaving about 2-3 inch at the top. Put the lid on securely and shake vigorously until all the sugar has dissolved.
- Leave the bottle in a warm place for 24-48 hours. Depending on how warm it is will affect this time. What is happening at this stage is the yeast is starting to convert the sugars to alcohol with the by product being carbon dioxide, or CO2. With there being no where for the CO2 to go it is absorbed back into the liquid causing it to be fizzy when opened!
- After 24 hours check the bottle by squeezing it, if it is really tight and you can hardly press the plastic in then it is ready for the fridge, if not leave it another day and it should be ready. This is why we use plastic bottles, if glass bottles where used there would be a risk of shattering if the pressure gets too high. With plastic it will stretch a bit and if it does over pressurise then it is no where near as dangerous!!!!!!!!!!!
- Leave it in the fridge for up to 24 hours to make sure it is really cold. While it is in the fridge the fermentation will slow down but not totally stop. When it has been in the fridge long enough to make it cold it is ready to serve. Be very careful opening it and if possible open it outside or over the sink as it can be very lively! I found out the hard way with a batch that was a little over lively; It's lid flew off when I had loosened it slightly and then a second later the bottle erupted like a bottle of champagne! Don't be put off by this though, just be warned!
- To serve you can pour it straight from the bottle but I prefer to pour it through a tea strainer as this collects all the grated ginger. For a extra special treat fill a glass with ice, a shot (or 2) or rum, squeeze half a lime in and top up with fresh ginger ale, delicious!
 |
| A nobbly chunk of ginger! |
 |
| A zested lemon! |
 |
| Juicing the lemon |
 |
| Lemon juice |
 |
| A cup of sugar |
 |
| Pouring the sugar in |
 |
| Yeast |
 |
| The recipe says 1 packet of bakers yeast but as I had a tin of it I just used a cap full and it worked fine |
 |
| Rinsing the juice from the grater |
 |
| A nice out of focus shot of the lemon and ginger slurry going in |
 |
| "We have a blockage, bring me a skewer!" |
 |
| After 2 days the pressure test, this is me pressing hard but getting nowhere! |
 |
| Poured through a tea strainer or sieve |
 |
| All them bits from such a small glass of ginger ale! |
 |
| Mmmmmmm, bubbly! |
Monday, 23 April 2012
Coopers Mexican Cerveza Lager Kit
Yesterday I started a new 40 pint batch of lager. This one is by Coopers and it is their Mexican Cerveza. I have heard good things about this lager so I'm hoping it will turn out good. One difference I've made is to use golden syrup instead of sugar as, again, I've been told this makes a nicer end product. I also used 200g of sugar as the golden syrup doesn't quite have enough sugar contents to complete the fermentation. When I checked on it this morning I could see that fermentation has started. I do intend on using a slightly different method to prime the lager when bottling but I will mention that when I bottle the lager in just over a week!
 |
| The beer kit - Enough for 40 pints! |
 |
| The home brew kit and the golden syrup. |
 |
| 200g of sugar weighed out |
Subscribe to:
Posts (Atom)