A blog originally for keeping track of my hobby of being a Beekeeper which has evolved to include Home Brewing and even more recently to follow me and my families approach to "The Good Life". Eventually I hope to include baking recipes and stories of our flock of chickens also reporting on the success and failure at the allotments.

Showing posts with label queen. Show all posts

Monday, 21 April 2014

Beekeeping Update and Other Bits

It seems like an age since I did my last post, last September to be precise! I have been fairly busy since then with various Beekeeping shenanigans and some home brewing. The main point I'm mentioning, which is partly why there has been so few posts by myself, is that at my local Beekeeping associations annual general meeting last year I was, reluctantly, voted in as secretary: this entails me answering quite a few emails and forwarding on various publications I get emailed. I said reluctantly as the post of secretary is not the most glamorous of positions but I wanted to be more involved and we needed a secretary! At the same meeting I also somehow became the librarian for the association, I must learn to keep my hand down in future! I now am in possession of WPBKA's collection of Beekeeping books throughout the ages and some of them are rather old. I haven't checked them all yet but some are easily as old as my dad.

My Bees have survived the Winter this year and they seem to be thriving. I went into Winter with 3 hives but one was very light on Bees and I never confirmed there was a new Queen mated in there, that colony didn't survive but the other 2 have. I have seen the Queen in one of the hives and the other has brood at all levels. I have already added supers as the oil seed rape is in full flower and honey has started to be stored in the brood area. I'm hoping for an ok return this year and when the swarm cells appear I'm looking to take a nucleus or 2 from the hives. With any luck I'll have at least 4 colonies going into Winter 2014.

I have recently finished (almost) building a top bar hive from some wooden boards I have. With any luck I'll get this occupied soon and report back on my findings. I have spoken to people at my association and the general consensus is that people don't like them in my area but in other areas people swear by them. In my humble opinion the best way to find out is to try it myself. The only bit I have left to complete is the actual top bars, they have been cut and just need some wax foundation to be placed into the grooves. I have looked at other options but I will try wax strips to start with and if succesful will experiment with other methods as well. One other option is string soaked in molten wax which would be easier to implement but not look as nice! The below picture is prior to the legs being attached and has also since been painted more so looks nicer. I may dedicate a fulll post to it when it is fully complete.


Topbar Hive
Almost finished topbar hive


From my last post I have pressed all my apples using a friends cider press and it has femermented into an almost drinkable brew. It is now bottled and maturing. The last bottle I tried was better than the first so in time I could have a decent cider. The recipe was an easy one to follow: loads of apples, pressed then left to ferment, I kept it as simple as that. No yeast, sugar or water added, just apple juice. Again, I have lots more photos so will probably do a longer post for the cider making.
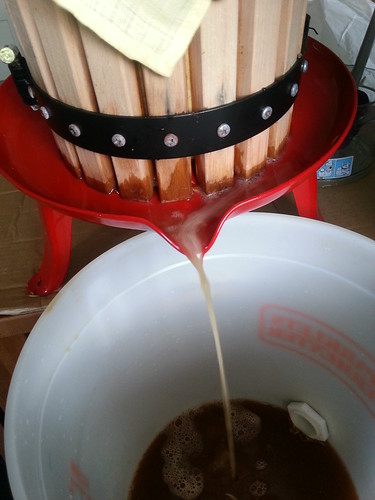
Home Made Cider


Lastly I will add details of my upcoming fund raising event with the hope I can get a few more sponsors. This August will mark the 3 year anniversary of my mother passing away and also approx 10 years from when I last had a full hair cut. In 2004 I had my head shaved for cancer research and raised an impressive £400. This time I'm aiming much higher and am attempting to raise £1000, however I will need a lot of help to do it. I am raising money for the Stroke Association this time, as that is what my Mum died of. Hopefully with your help we can reduce the number of people and families that have to suffer because of this condition. Any little helps, seriously, if you can just manage a pound or a dollar then that is fine. If you are in a position to donate then I ask that you share my donation link via your social media sites and hopefully I will raise a bit more. Here is the link to donate and if you live in the UK then you can donate via text, put this into the body of your text changing the amount to how much you want to donate "IMHS69 £5" and then send to 70070. Thanks greatly in advance for your kindness.

Wednesday, 31 July 2013

Apiary Inspection and Honey Collection 25/07/2013

While my daughter was at the childminders on Thursday me and Steph did an inspection and honey harvest. It was another glorious day and the Bees were coming and going being a busy as Bees are famous for being! The first hive checked was the smaller hive that was recently in a nucleus hive. Steph led the inspection on this one and within a few minutes we had found the Queen. She was still small but I think she was a slight bit larger than last time. I think when we go down to see them next time I will add some syrup to try to get them to build up faster. Here are a few pictures of Steph doing the inspection.


Untitled
The Bees have started to build the comb up here.


Untitled


Untitled
The white capped area is stored honey. As this is a new hive we won't be taking any from them this year.

The main hive was quickly checked now. This hive was split into 2 a short while ago using the snelgrove method. The way I had split it was to have the Queen in the bottom hive and all the brood at the top ready to make a new Queen. Within minutes of checking the top hive I realised I had made a mistake somewhere as there where still eggs visible meaning the Queen was still there! Sure enough, in a few frames I found her. Although this is not what I intended it still will be OK as it just means that the new Queen will be raised in the bottom brood box rather than the top. Oh well, another lesson learnt! After that I decided not to check the bottom box as I didn't want to disturb any new Queen there could be. 


Untitled


Untitled


Untitled


Untitled


Untitled


The next thing to do was take some honey! In the frames within the hive there was an abundance of honey stored so I don't think they'll mind me taking some. This basically consisted of taking the frames out and shaking and blowing the Bees away from the comb and then taking them home!


Untitled
This box is almost full of honey!

Below are a couple of videos of me and Steph shaking and blowing the frames to get the Bees off (I worded that to avoid saying "blowing the Bees off" as some may think that rude!)


Sunday, 28 July 2013

Apiary Visit 18/07/2013

Another scorching day in the area I live and also the day I went to check on the Bees. Prior to my inspection I had made a few new frames up ready to be put in the Nucleus hive with a newly mated Queen I had seen last time I went. I'd also arranged to meet with my Brother-In-Laws Dad, Mick, as he has an interest in insects and Bees. He has several colonies of ants that he keeps. I may at some point get the pleasure of seeing them and writing about them.

We met at the land and got the smoker lit and suited up ready to look in the hives. It was sweltering heat and before long I had sweat pouring off me. We started with the Nucleus hive that had the newly mated Queen in it and I began transferring the frames to a full sized hive so they had room to expand. We did manage to see the Queen although she is slightly small at the moment, hopefully she will get a little bigger than she is now or I may have to replace her. There was also plenty of eggs and larva present so I'm hoping that she has bred well and will not need replacing. Due to her currrent size I decided not to mark her yet.

The next hive was my main hive and we found the Queen fairly easy in there as well. As I am trying to increase my hives I used something called a snelgrove board which I have made earlier in the year. The board is used to manipulate the Bees and can be used as either a swarm control method or for making increases while at the same time not interferring with honey production. It works by seperating the brood and the Queen making them think they have swarmed and reducing the tendancy for them to want to leave. The seperated brood, with its young Bees, will then create a new Queen effectively making 2 colonies altogether. From there you can either split the 2 brood chambers or unite them back to one, although you need to get rid of one of the Queens to do this. The method is easier to explain when you're at the apiary then in writing so will leave it at that! I will probably do a more detailed post when I can describe it better.

While we were checking the brood box I noticed that the Bees had created a full comb of honey where I'd left a gap. I managed to pry this out without damaging this too much and shared the comb with Mick. He was more than impressed to be taking some honey home with him! When I checked the super that I had above the brood chamber I was excited to feel how heavy it was and my next post will probably be about honey extraction!

Honey comb
Mick with the honey comb.


Honey comb
We couldn't find anything to put the comb in so it is wrapped in a couple of latex gloves!


Snelgrove Board
The snelgrove board. This is a picture of it unfinished. The finished version has a hole in the middle with a fine wire mesh over it.

Wednesday, 26 June 2013

Apiary Visit - Queen and Queen Cell

After work today I visited my apiary to check on the Bees and see how my nucleus hive was getting on. Upon arrival at the land I was greeted by my Dad and Brother-in-law working hard at the land. My Brother-in-law was busy wrestling with some more clay in the ground and I'm not sure what my Dad was doing but he was rather sweaty. I had a quick chat with them then lit my smoker ready to get into the hives.

The first hive I inspected was the nucleus hive which I made last Wednesday. I gave it a really small puff of smoke and opened it up. Within the second frame I saw what I was hoping to see which was a Queen cell dangling off the face of one of the combs. As this cell that I saw was already capped it must be at least 8 days old which means in just over a week she should hatch and then with some good weather do her maiden flight and get mated with drones.


Queen Cell
Queen Cell

Next was the main hive and to start with I checked the super I put on last week for any honey. At the moment there is no honey in there but under the Queen excluder in the half brood box below there about 3 frames almost absolutely full of honey and also mostly capped. This is the honey that I will be leaving them as stores for a couple of reasons. Firstly they worked hard for it so they deserve it and secondly as there has already been brood raised in the cells it may taint the honey. The honey in the super is on a combination of drawn out clean frames and foundation only frames so will be clean for when they start filling it with honey.

When I moved onto the main brood chamber I was keeping an eye out for the Queen and any signs of Queen cells. Within a few cells I had found everything I needed to find but not what I wanted to see; I needed to see eggs, pollen and larva but I wanted to see the Queen! After a couple more frames I was rewarded with a sight of Her Majesty!


Queen Bee


When I had finished the inspection I put the hive together and went over to help my Dad move some equipment around the land. We moved a large storage box to a corner and when we got there we saw a frog. Unfortunately it was a rather camera shy little beast and kept jumping away before I got a decent picture of it but you can just see it in the below picture.


Untitled

Sunday, 23 June 2013

New Bees

As mentioned in my last post I am quite excited (understatement) to announce the arrival of my new Bees. After the devastation of finding my hives had died earlier on in the year it is such a relief to be back in business. I consider myself very lucky to have made some good friends in the association and through one of them have been sold a new colony. Unlike the first Bees I bought, the one I just bought is a colony at full strength basically meaning that rather than the 5 frames of Bees you can get in a standard nucleus colony, I got a brood box full of frames of Bees, stores and eggs. To make it even better there is a half box of brood as well which is just brood in a super. This extra space allows for a larger amount of brood and less congestion.

When we took the hive down to the apiary site the colony was still housed in equipment lent to me by the guy who sold me the hive. I have since been down and done an inspection and transferred it all into my own equipment. I also took some frames out of the colony and placed them in a nucleus box to make a new colony. In this box I have placed a full frame of worker brood that is ready to hatch and a frame of eggs so they can raise a new Queen. I also put 2 frames of food and a frame of foundation for them to draw out themselves.

Beeeeeeees!
Me and Bees


 I have since spoken to another Beekeeper and he has given me some guidance on how to raise a better quality Queen than the method I'm using but he says not all is lost. He recommends I knock down any Queen cells that are created until all the brood has hatched an then put another frame with only a few eggs on. This will force them to only make a few cells and then I will destroy them all apart from 1. With all the brood hatched there will be more workers to feed the new Queen cell and as there will be only a single cell to feed she will develop into a better Queen.... in theory. I will let you know how that goes on.


In the video you can see there are quite a few Bees to say the least and to the right of the main hive you can see the nucleus hive as well. In one of my next inspections I will be doing the method explained to me by the other Beekeeper to raise better Queens. It involves having a second brood area above the supers and raising a second Queen in the top but I'll go into more detail when that is done.


Beeeeeeees!
Happy Beekeeper. In the bottom left of pic you can see where my good wife fixed a hole in my suit!

Friday, 1 February 2013

Wakefield and Pontefract Beekeepers: January Meeting

This Monday just gone was the first meeting we had of 2013 and the guest speaker was a guy called Gerry Collins. I think this was the 3rd time we have had him as a guest speaker and, as one of the times before, his talk was on swarming which included various methods of prevention including the Demaree method. I will be trying this method out on my Bees in the near future so won't go into any details here. If you are interested you can either google Demaree or try this link to Barnsley Beekeepers site that explains it very well.

The talk was fascinating and also very long; the usual meeting are scheduled to finish at 21.00, they were still talking at 21.45 when I had to leave to go to work as I was on the night shift. There was a short break in the middle where I got talking to people as usual and also in this time I picked up something I had ordered from a fellow Beekeeper who had organised a bulk order with Paynes Bee Farm. The item I'd ordered was a poly nuc which is basically a nucleus hive made, surprisingly, of polystyrene; not the kind of polystyrene you get goods packed in but a much denser type that is a lot more resilient and weighs more. Below are the photos of it.


poly nuc hive
The poly nuc

poly nuc hive
This screws onto the entrance giving you option of open, closed with or without ventilation and with mouse guard included

poly nuc hive
It came with 2 plastic inserts that you put next to the hive body and the feeder compartment. This one is a Queen excluder.

poly nuc hive
The hive from above showing the feeder area and the screened bottom.

poly nuc hive
The other plastic insert completely blocks off the feeder.

poly nuc hive
In this photo you can see the light reflecting from the clear cover, with this you can look into the hive with the lid off without disturbing the brood chamber too much.

All in all it looks and feels like a quality product. I can't say anything about the operating of it yet but will be able to later in the season but I am very hopeful that it will help me. Also everyone I talked to has said how good they are for creating nuc colonies. Next time you see this hive it should have a happy colony of Bees in it!

Tuesday, 3 July 2012

Apiary Inspection - 03/07/2012 - Bad News, Worse News, Good News, Better News

About a month ago I purchased my third full hive and have been building it and painting it over the last few weeks. As with the last hive I bought, this one is from www.fragile-planet.co.uk. The last hive I bought from them was fairly easy to construct and had 2 supers, this hive has 3 supers included and was incredibly easy to construct; this one just seemed better made, the saw cuts more precise and smooth. I had heard people at my local Bee meeting say to avoid them but I have had no issues with them. Below is a picture of the hive fully built but the supers haven't been painted yet. The reason I paint them is because they are made of ply boards rather than cedar which doesn't need to be painted. Also in the picture at the far right you can just see a demijohn full of elder flower wine, there'll be a post on that later!

Hive Number 3

The reason I started with the building of the hive is that today I took the hive up to the apiary to move the swarm into from the nuc box that it was in. The supers are still unpainted in my loft as I have a couple of spare supers ready anyway so there is no urgency to finish them. So from the above picture I took all the bits that are painted white up to the allotment, stopping off at my Dads to pick the keys up for the gate. 

The Bad News!

The first hive I inspected when I arrived at the apiary was the first hive I bought. The last mention of this hive was in a previous post, that can be found here, in which I mentioned the multiple eggs in the cells, possibly indicating laying workers or a new Queen that hasn't learnt to lay properly; in the last weeks since then I have checked on them a couple of times and all the brood has been drone brood, when I went today there was no brood, no eggs and no sign of a Queen. What I think has happened is that I did have a Queen but due to bad weather she never managed to get mated and so started laying drone brood. After a couple of weeks of this I believe the workers have committed regicide (killed the Queen) due to her ineptness. The problem with this is that the Bees have no means to make a new Queen. Due to this I have taken a frame of eggs from one of my other hives and after shaking all the Bees off the frame, placed it into the hive. I'm hoping next time I check the hive I will see a Queen cell or 2 on the frame. 

The Worse News and Good News!

When I opened the nuc hive I had a bit of a shock. Over the last few weeks I have been feeding the hive with sugar syrup but due to lack of space in the nucleus hive I was unable to put a frame feeder in so used a baggy feeder; this is basically a plastic bag with syrup in that has a cut in the top so the bees have access to the syrup. I think that the cut I made in the bag could have been too large and the syrup leaked all over the back of the hive because when I lifted the lid one end was covered in mould! The majority of it was on the hive rather than the frames so it wasn't as bad as could be, the Bees were still doing well, but the hive may be beyond repair as the mould was quite thick and wouldn't wipe off. The better news is that I have managed to move the frames over to the newly built hive successfully and put a frame feeder in full of syrup so hopefully no more mould! This hive is the one with Queen Bee-atrix in who is marked with a white dot so really easy to see. I easily spotted her when passing the frames over. I haven't taken a picture of the moldy hive but have taken a picture where you can see part of the frame that has been marked. 

Honey Bees!

The Better News!

The last hive I checked is my first hive I bought from fragile-planet and also the one that the swarm came from. I haven't seen any evidence of having a  Queen in any of the checks I've done since the swarm left the hive but I also have tried not to disturb the hive too much until today. When I opened the hive everything seemed good. The frame feeder was empty so I filled it with syrup and will keep feeding them until they are successfully storing their own honey. The first frame I checked was doing well, the Bees had drawn half the bare foundation out into comb and better still the next frame had eggs in it! This means I have a successful laying Queen somewhere as the eggs were nice and neat at the bottom of the cells in a good solid pattern. While inspecting this frame I noticed a rather large Bee on the side bar of the frame. I had to look twice and when it sunk in I realized I was looking at a Queen! I was delighted, I'd managed to find an unmarked Queen, albeit she was on a frame that wasn't fully occupied and when I first saw her she was on her own. I quickly got my marking cage and pen out one handed  and then attempted to catch her in the cage. My first couple of attempts were fruitless but I eventually managed to trap her in there and gently press it down so she couldn't move around too much. I then carefully put a small white dot on her back (and a few dots of white on the wings of the workers around her) and left her for a few minutes for the paint to dry. I couldn't get a picture of her as I had a frame in one hand while in the other I was juggling the pen and hive tool. When I was happy the paint was dry I carefully replaced the frame and checked the last few frames. As I was putting the hive back together I noticed a Bumblebee had landed on a piece of equipment I had lying around.


Bumble Bee

I also took a picture of some borage that we are growing next to the apiary. Honeybees apparently go mad for borage. At the moment it looks rather unimpressive but when the blue flowers are opened up it will look great. 

Barage

Sunday, 27 May 2012

Apiary Inspection 25/05/2012

After all the rubbish weather we've had in Wakefield this May the last few days have been a really refreshing change, the weather has been absolutely smashing! For nearly a week now we have had glorious sunshine and I have been desperate to get to my apiary and see how my hives are doing, but have been stuck doing the late shift at work; this Friday was my first day off and as luck would be the weather was still great so I did my inspection.

When I got to the apiary I got suited up and just watched the Bees for a few minutes; there was lots of bees returning with pollen and nectar from both hives. So far so good. With the weather being so nice there would be a much reduced number of Bees in the hive as they are out foraging; due to this I decided to be brave and didn't use smoke. The first hive I went into was my original hive which had queen cells in it last time I checked. I was hoping to find the queen and mark her so I would be able to find her easier in the future. Within a couple of frames my hopes where raised when I could see eggs in the cells but a second later they were dashed slightly as I noticed some of the cells had multiple eggs in them. More than one egg in a cell can be a sign of worker Bees laying but sometimes newly mated queens lay more than one egg until they get used to laying. Also the eggs were right at the bottom of the cells which is also encouraging as laying workers will lay at the side of the cell as their abdomens aren't as long. I continued searching but was unable to find the queen. There was plenty of honey stored in the brood area and lots of pollen as well, they have even started storing some honey in the supers.

The second hive was a lot simpler. I found the queen in the second frame so there was no concerns. The hive had plenty of stores and also plenty of room to expand into the new frames. All in all I was very happy with the progress of this hive. When I moved onto the super I had a very pleasant surprise, they had started storing loads of honey and some of it looked like they where about to start capping it. This means I could be harvesting some honey very soon! As the majority of the honey will probably be from oil seed rape flower I will have to hurry up with extracting the honey as oil seed rape honey has a tendency to set solid in the cells! Hopefully that won't happen but if it does I'll just have to scrape it all out and maybe dissolve it in water to make mead!

Tuesday, 8 May 2012

Apiary Inspection 08/05/2012

Today after work I visited the Bees and did a good inspection of both hives. When I got to the apiary the first thing I did was watch the Bees coming and going for a few minutes. I could see Bees returning from the nearby oil seed rape fields loaded up with pollen. When I'd got the smoker lit and I had suited up I dived into the first hive.

Untitled

The hive had still got a queen excluder under the brood chamber that was put in place to stop Queen Bee-atrix from absconding. My first job was to remove this then place the whole hive onto my newly constructed hive stand. When I started working through the hive I was really lucky in that the Queen was on the first frame I looked at (the first couple of frames aren't fully drawn out yet so I didn't have a proper look at them). There were eggs and brood of all levels present in the hive. As this hive seems to be doing well I didn't spend too much time on it and did a quick inspection. One thing that I noted was that on one of the last frames the Bees had made some odd looking comb. It's hard to describe what it looked like and I will try for a photo next time. The comb was kind of bent around and overlapped, this may cause a problem later as the Queen may be able to hide in the flap created. I may have to remove this odd shaped comb at some time! When I was happy that I'd done all I could in the hive I filled up the frame feeder with syrup and put the hive back together with a extra super so the Bees have more room to start expanding.

Untitled

Onto my original hive. This is the hive that had the Queen removed and last time I was at the hive there were Queen cells. By now the Queen cells should have hatched and any day now the Queen should be doing her mating flight. When I opened the hive I was impressed with the amount of Bees but there was no brood or eggs which to be honest was expected. One thing that did shock me was that there was still Queen cells present so I took a few photos of them. The only thing I can think of is that the Queen has already hatched and killed the Queens in the other cells, but the worker Bees haven't had time to remove the dead Queen cells. I did see 2 Queen cells that were empty. Fingers crossed that next time I visit there will be eggs. The next new task for me then would be to try to mark the new Queen to make her easy to see. Usually Queens are marked a different colour each year but as I am colour blind I am going to just use white to begin with. In the hive there was lots of stored nectar and hopefully they will start storing in the supers as soon as eggs are being laid.

Below are the pictures of the Queen cells I took.


Untitled
A Queen cell

Untitled
2 Queen cells and a few drones visible as well


Untitled
Busy busy Bees!

Sunday, 29 April 2012

Apiary Visit 28/04/2012 - Feeding The Bees

Anyone who lives in the north of England will be well aware of the lovely weather we have been having over the last few weeks, in fact we have had little more than a few hours of dry weather since the last time I went to the Bees and split the hive. Due to this bad weather I have been increasingly worried for the Bees, especially the hive that I know is queenless. For a few days I have been trying to get to the Bees but kept putting it off due to the rain but then I received a email from the National Bee Unit advising us (the Beekeeper) to feed our Bees as starvation is a real issue at the moment. I decided that opening the hive for a short time and risking a little water getting in was better than letting them starve.

Friday just gone would have been a perfect day for feeding the Bees as it was much better weather and the sun even revealed herself for a short time, unfortunately I had already made plans for the day and wasn't at home. By the time I did get home it had started raining again anyway. The following day, yesterday, was again slightly better so I prepared some syrup and took a spare frame feeder up with me to the apiary. I had to stop off at my Dad's on the way as he has the keys to the allotment gate, it was about this point it started raining again.

When I got to the allotment the first thing I did was to have a look at the apiary and I was surprised to see a Bee flying back into one of my hives; it was only lightly raining and as it wasn't raining a short time before she could have been returning from a foraging trip. The first hive I fed was the new hive that has Queen Bee-atrix in. It was fairly simple to do this hive as it has no supers on yet so less equipment to move. I removed the hive roof and slid the crownboard slightly back to reveal the feeder frame only. The sugar syrup was then poured into the frame filling it to the top. I didn't fully open the hive but from the small amount I opened it I could see there was a lot of activity. I will do a full inspection as soon as the weather allows.

The next hive was slightly different. As it already had two supers on it I had to remove these first; I did have a quick look in the supers first and found that they did still have some stores but not much. This time of year with better weather they should be full of oil seed honey but unfortunately it was not to be. Once I had taken the supers off and placed them to one side I removed the Queen excluder (not sure why that is still in as this hive is Queenless!) to allow me access to the brood chamber, which was full of Bees! The first thing I needed to do was remove a frame so I could put the frame feeder in. Last time I was in the hive I moved a frame of brood further out to the edge of the box, this was a mistake and I will not do it again. With the weather being wet and cold the Bees may have formed a ball to stay warmer and by doing this they have left the frame that was at the edge and due to this it has got colder and all the brood has died. I have taken this frame out and taken photos of it which I will put at the end of this post. With the space created by removing this frame I placed the other frame feeder in it's place and filled it with the remaining syrup. Now for the good news......

......The rain was even lighter now so I decided to have a quick look at a frame, unfortunately I was unable to take any pictures of what I saw which is a shame as it was the best sight I could have hoped for, a Queen cell fully formed and capped; this means the Bees have realized they have no Queen and raised a new one from eggs that where already in the hive, they do this by feeding a freshly hatched larva royal jelly only. Now with any luck there will be some decent weather once she has hatched so she can go and do her mating flight, fingers crossed! After seeing the Queen cell I closed the hive up. There probably will be more that one Queen cell in there but I didn't want to disturb them too much.


Frame of Dead Brood
The frame of dead brood. 

Untitled
I removed some of the cappings to see what state the larva was in. 

Untitled
The larger cells have drone brood in them

Untitled
This shows pollen present in the frame

Untitled
A Queen cup on the side of the frame, if an egg had been placed in this the Bees could have created a Queen cell from it

Untitled
By placing a match into a cell you can test for American Foul Brood; if it was present it would "rope" from the match, I can only describe this as a snot like substance stuck to the match, luckily it looks like I don't have AFB

Untitled
The lines of empty cells are actually where the wire runs through the foundation to give it extra strength, the Queen has detected this and chosen not to lay in there. I have read somewhere that this is actually a good trait for a Queen.

Untitled
A dead Bee not fully developed, if it had died of European Foul Brood you would be able to see it's gut through the skin and it would be bright white or creamy. It looks like I don't have EFB either thankfully.

Untitled
Another Queen cup


I have learned a lesson with this and in the future will not move frames out of the cluster in the brood chamber. I have had a good look at the frame and I am fairly happy the brood died of being chilled at the edge of the brood box, rather than any kind of disease. I will do full inspections soon, if the weather picks up, and hopefully will get photos of the new Queen. I will also attempt to mark her to make her easy to spot! 

Tuesday, 17 April 2012

Apiary inspection 16/04/2012 - The Split

This is the Beekeeper's Wife speaking now. I volunteered to write this blog in order to keep what could be a very technical and complex apiary visit simple for those of us who aren't as knowledgable about Bees.

On Monday (16.04.12) I had a day off work and the Beekeeper's Daughter was with her childminders and the weather was warm and bright so we went to visit the Bees to do an inspection and to split the hive. When we parked at the side of the allotment we could see a huge amount of Bees in front of the hive and they were very noisy. We put our suits on and lit the smoker (even though it was barely used) and approached the hive taking with us the brood box and roof of the spare hive (Hive 2). What follows is the step by step guide to "How to Split Your Hive".
  • Take off the roof and supers of Hive 1 (AKA Buzzingham Palace) and set aside.
  • Move Hive 1 about a metre to the left and place Hive 2 where Hive 1 once was. This will mean that any bees that were out foraging will return to Hive 2. All the bees that were still in Hive 1 will learn where they have been moved to on their subsequent flights out.
  • Inspect the frames in Hive 1 as normal, looking for the Queen, eggs and larvae.
  • When the Queen has been found place the frame that she is on into Hive 2 leaving Hive 1 Queenless. When the remaining Bees become aware that they have no Queen they SHOULD start to produce a replacement by feeding some larvae with Royal Jelly.
  • Move a couple of other frames of worker bees from Hive 1 to Hive 2 so they can look after the Queen and continue to collect pollen and nectar.
  • Add a frame feeder to Hive 2, full of sugar water (2lb sugar dissolved into 2 pints water) to help the newly moved bees to eat well as most of their honey stores are in Hive 1.
  • As Hive 2 needs to have some more adult bees than just those on the couple of full frames that have been transferred, it is necessary to "shake" some more bees into Hive 2 from the frames taken from Hive 1. To do this take a frame full of bees in both hands and hold into Hive 2, brace yourself and shake down really hard, dislodging most bees into their new home.
  •  Replace the roof on both hives and keep fingers crossed that Hive 1 will replace their Queen and that Hive 2 starts to produce lots of baby bees to collect nectar to make lots of honey.
This operation was very interesting to watch and participate in a little. I was amazed at just how many bees were flying around and landing on me and just how noisy they were; and just how un-scary it was!


Step shaking a frame of bees
Shaking a frame of bees

Splitting the hive
A beekeeper and his hives!

Friday, 13 April 2012

Apiary inspection 10/04/2012

Tuesday just gone was my latest inspection of my beehive and maybe the last time I visit a single colony as I'm hoping to split the colony on my next inspection. As usual when I arrived at the allotment I started by lighting my smoker and then going to see the Bees from just outside the apiary. There were a few Bees coming and going but not a huge amount of activity. I suited up and went into the apiary... it was at this point my smoker went out! I exited the apiary and together with my father got the smoker working properly!

Once in the apiary properly I removed the roof and started looking through the super; I was happy to see quite a good amount of honey being stored. I removed the super next and started working on the brood chamber. Underneath the Queen excluder I was shocked to see how many Bees there actually was; in mid summer last year there were a lot of Bees and I would say that there was as many as then! When I started working through the brood I could see lots of sealed brood and larva at all stages and then I saw her majesty. I didn't see any Queen cells but due to the amount of Bees in the chamber I guess that they are probably not far off being ready to swarm. When I had finished my inspection I put the hive back together but added another super so there are 2 on now. This should give them plenty of space for honey and also relieve congestion in the hive. The next time I visit them I plan to split the hive, that will probably be my next post and possibly a long post depending on how successful I am!

I took a few photos while at the allotment, 1 inside the hive and a short video and a few of the flowers in the area that the girls will hopefully be working on.

Bees in the super
Bees in the super


Oil seed rape
Oil seed rape in field next to allotment


Plum Tree
Plum tree in blossom

Plum Flower
Close up of plum blossom
Apple Blossom
Close up of apple blossom


Pear Blossom
Close up of pear blossom


Dead Red Nettle
Dead red nettle, considered a weed but I quite like it and apparently so do the Bees