A blog originally for keeping track of my hobby of being a Beekeeper which has evolved to include Home Brewing and even more recently to follow me and my families approach to "The Good Life". Eventually I hope to include baking recipes and stories of our flock of chickens also reporting on the success and failure at the allotments.

Thursday 29 December 2011

Homebrew Lager Kit

As mentioned in a very recent post, I got a lager making kit for Christmas. Yesterday I went to see my sister and brother-in-law and he has recently made the same kit so I had a chance to taste it before actually making it. I must say I was impressed with the flavour and decided to waste as little time as possible starting my own brew. I couldn't start it the same day so as soon as I'd let the chickens out this morning I got started.

The process was really easy as it was from an all in one kit. All I had to do was sterilize the brewing bucket and provide 1kg of sugar then make up with water to 23l.

1kg of sugar

The contents of the tin of lager mix.

Pour the contents into the bucket

Once sugar and mix are added put some water in to dissolve sugar.

When all is dissolved add water to make to 23l then sprinkle the sachet of yeast into the brew.  I then took a gravity reading of 1.034 at this point so will know the strength of the lager.
The whole process was really easy and I would encourage people to have a go themselves. The next thing to do is wait 4-8 days until fermentation has finished and then bottle it, then leave a further week or 2 for flavour to develop. I'll let you know how it goes. At some point in the future I will aim to make beer or lager without the aid of a kit but this will suffice for now.

Apiary inspection 28/12/2011

Yesterday was probably my final hive inspection of this year and in this inspection I applied the main varroa treatment for the year, oxalic acid. This acid is found in honey but at really low levels and by introducing it into the hive it kills the varroa mite. The treatment only affects adult Bees so the best time of year to apply the treatment is around now when the level of brood is at a minimum. I know that I have mentioned in a previous post that I would ideally like to keep Bees naturally without the use of chemicals, however as I am still a novice I believe getting my Bees through their first winter and into spring healthy is my number 1 concern. Maybe later I will try the more natural way.

To start with I needed to get hold of oxalic acid crystals and was in luck when one of the people I did my training course with offered to give me enough for two treatments. The exact amount of crystal he gave me was 7.5g per treatment. The crystals where then mixed by myself with 100g of sugar and 100ml of water to give a solution that is 3.2% oxalic in a 1:1 sugar solution. This was harder than it sounds, it took a long time to dissolve the sugar into the water and even longer to dissolve the crystals but I got there in the end. The next step was to introduce the mix to the Bees.

Upon arrival at the hive there was a distinct lack of movement outside the hive, but to be honest it was rather windy and I'd rather have been tucked up in my house. When I removed the hive roof I could see what was left of the fondant I added previously; 1 empty box and 1 almost full. As I removed the crownboard the Bees started to show themselves but were not as lively as I have seen them in the past. I did a quick check of the weight of the remaining frames by gently lifting a couple with my new hive tool and was surprised at how much honey they actually had left; I can only think that with the mild end to autumn the Bees have been collecting later than I imagined they would do, clever Bees! The only thing left for me to do now was to apply the treatment.

The treatment of oxalic acid recommends using 5ml of solution per seam of Bees; a seam being the Bees between 2 frames. In my case there were 9 seams with Bees in so I used a total of 45ml of solution. To apply the solution I used a syringe supplied by the same guy who gave me the crystals (thanks again Steve) and using this I sucked 5ml at a time into the syringe and gently dribbled this onto each seam of Bees. I was surprised that they didn't get aggressive when applying this but obviously happy not to get attacked. After each 5ml was applied I refilled the syringe until all seams had taken 5ml. When I'd put the treatment down I decided to take a short video of the inside of the hive. Here it is


Apart from maybe popping up and clearing snow from the hive (if we get any this year) and maybe a check to see if they have enough food stored, I believe this could have been my last hive visit until spring. I certainly won't be opening up the hive fully until the temperature has risen. In the next few months I will be continuing to go to my Beekeeping meetings and reading my new books which I got for Christmas as well as carrying on with home brewing.

Wednesday 28 December 2011

Christmas Gifts

This year I did very well for Christmas. I always appreciate the presents I receive but have been especially impressed this year at the actual usefulness of my gifts. Below are pictures of what I received that are relative to my blog. If anyone who bought me any of the presents below is reading this blog then thanks again!

A hive tool. There are 2 main designs of hive tool, I already had the other now I have this one as well. As I am looking to have at least 2 hives by next year and my partner enjoys getting her Bee suit on and helping it made sense to request a spare hive tool. The hook on the bottom is really useful for lifting frames!
On the left is a Queen cage; this is used to capture the Queen and the using a non toxic pen (on the right) apply a small dot of ink so she is easier to see. There are 5 colours used when marking Queens but as I'm colour blind I will stick to white. Multiple colours are used to tell the age of the Queen so as I'm only using 1 colour I will have to keep good notes.

Beeswax mould; I'm sure some point next year there will be a blog to show this in action. It's basically used to make blocks of wax. 

An egg cup and a honey spoon. The egg cup is from my 1 year old daughter and is probably my favorite present out of everything I got! 

A Bee car sticker and a wind up Bumble Bee torch!

A home brew kit for making 40 pints of lager (far left), a large fermenting vessel (middle, I already have one exactly the same but having a second can't be bad, more beer!) and a bottle corker (far right). I imagine these items will all feature in future posts that I will be writing soon 

Beekeeping books. I look forward to reading these and trying out some recipes. 

Getting Ready For Spring

In the last few weeks I have been busy getting ready for the new Beekeeping year. Firstly I have purchased plenty of jars in anticipation of a good honey crop. Even if I don't fill all the jars next year, which I don't expect to do, then I will have spare for the following year or some nice jars to use for jam making! I bought my jars from a glass company in Leeds called Spinkscompak. They have a wide range and as a member of Yorkshire Beekeepers I received a discount.

A full box of 108 hexagonal jars
These will look great with my honey in and labels!
A larger 1lb jar. I have 72 of these.
...and of course the lids for the jars!


I have also been making frames ready to go into my second hive that I hope to get occupied with Bees in the spring. I have made enough to fill 2 supers and just need to make the frames to go into the brood box now. Below is some pictures of me making frames.

All the pieces of a frame before assembly.
This piece gets cut out and nailed back in on top of the foundation.
The frame made up without being nailed together yet.
A nail in each corner, both sides, keeps the top bar in place.
Remember the bit cut out earlier, it is now nailed over the foundation securing it in place
The finished frame ready to be "drawn out" by the Bees ready for honey storage!

Friday 16 December 2011

Wine and Mead Bottled

I have been busy over the last few days bottling and racking some of my home brew. The brews I have done in the last few days have been ones where I was unable to get a initial gravity reading so I won't know how strong they are but that's half the fun.

To start with I bottled my dandelion wine (original post can be found here) as this was a smaller batch and one of the older ones. I have had a sneaky taste of it and so far it tastes quite nice, actually a lot nicer than I was expecting although this could be the flavour of the red grape juice I used. Either way if the taste gets better from what it is at the moment then I'm on to a winner and will make a much larger batch next year. I got 3 full bottles and a part bottle, the part bottle is in the fridge ready to drink and the others I have stored in the loft to age; by ageing the wine I hope to further improve the flavour.

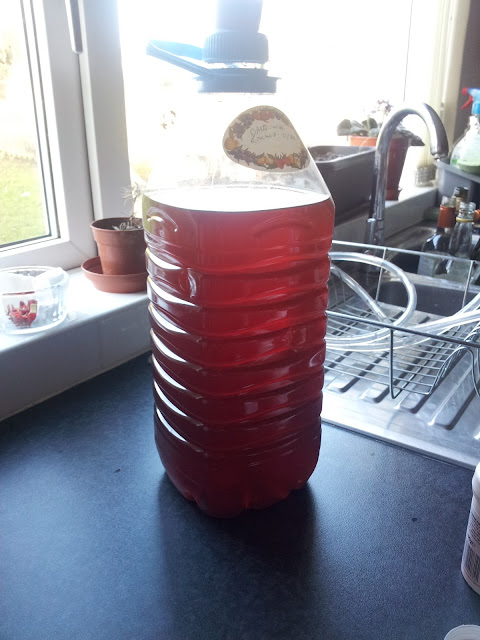
Dandelion wine in home made Demijohn, dilute pop bottle!
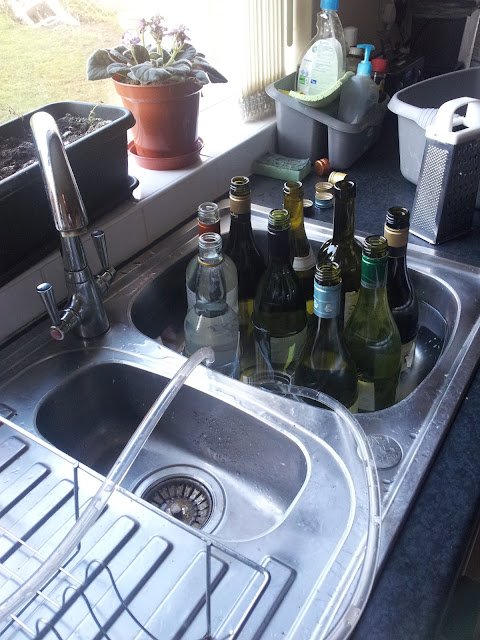
Bottles I've been collecting. Soaking to try to loosen the labels. The next step was to sterilize them.
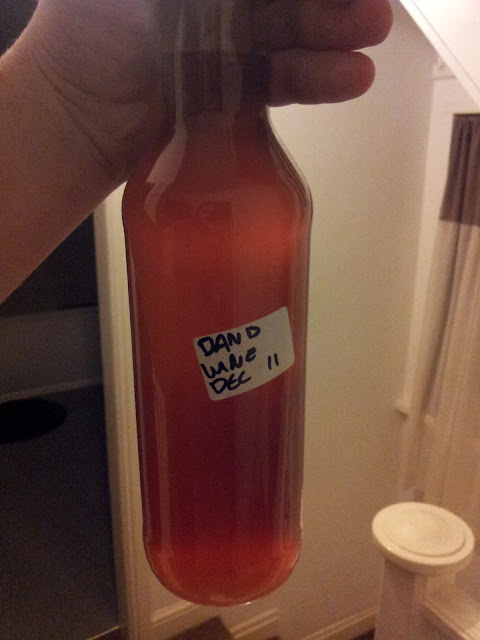
The finished product bottled and now away in storage in my loft. 

The next thing I bottled was the remainder of the second batch of mead I made at the start of the year (again link for that post here). This was a really large batch and I already have 3 gallons of it stored in my earthenware demijohns (link to that post here; in that post it says I have 4 demijohns but actually I had 5) that my granddad gave me at the beginning of the year. That left me with 2 demijohns with the mead in; one of these I have left alone and the other I added more honey to a while ago although I can't find the post that says how much honey was added, oh well! I got 6 bottles from each demijohn and have stored them along with the dandelion wine. I had a small taste of the mead as it was being bottled and it has got some taste, more than it has in previous tests, it may turn out nice after all when it's aged a while.

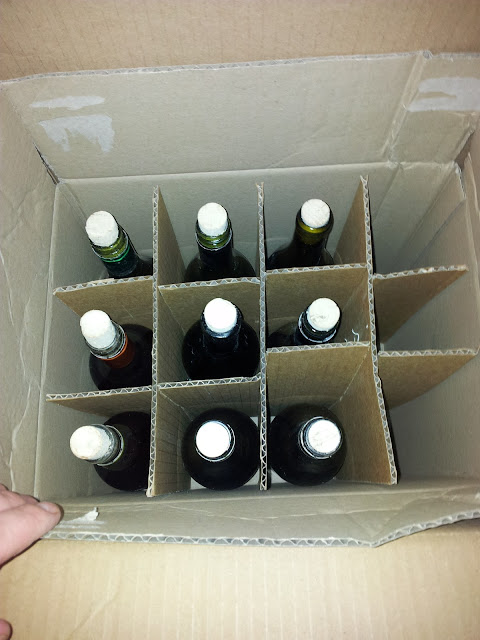
Bottled up and ready for storage.
The sweetened mead ready for storage.
Once I'd bottled all the mead I had a few empty demijohns so while I had the equipment out I also racked one batch of raspberry wine. This batch has been going since July so is also nearly ready to bottle up but I now have a shortage of wine bottles so will be asking my dad to start saving them again for me. The raspberry wine had developed a thin layer of sediment on the bottom, which is to be expected as this was the second time I racked it, the first time it had a very thick layer of sediment. Next time there will, hopefully, be little to no sediment for when I bottle it.

And finally with the remaining demijohns I had I've made 2 further batches of J.A.O. mead as this is my favorite and easiest to do. I followed the method on this page but as with the last batch of this I made I have upped the amount of honey to 1.8kg so now have 3 demijohns full of this at various stages of development! I hope the extra honey doesn't spoil it but I doubt it will, they are all smelling rather nice and the oldest of the 3 is clearing nicely.

Solidified honey.

Not even 1kg yet. 

1.8kg dissolving in boiled water that has been left to cool for about 30 minutes

This much honey takes a long time to dissolve even with vigorous stirring


Sunday 4 December 2011

Wakefield and Pontefract Beekeepers: November Meeting

This months meeting was titled Queens and Things and was presented by a guy called Gerry Collins. As you can probably imagine by the title the subject was Queens and included other little bits.
We did have a presentation by him last year. Gerry mentioned that he used to be a biology teacher and some of this was shown in his presentation; he named a few of the pheromones that Bees produce along with the names of the glands that produce them, unfortunately I don't remember the names or I would have included them here. I may in the future need to learn them when taking advanced Beekeeping exams but at this stage I don't think I need to know them.

We were shown many slides throughout the presentation showing pictures of Queens illustrating the possible problems with locating her majesty. For example in one picture she could be clearly seen and then in a second shot taken seconds after the Queen had disappeared into a cluster of Bees. Other pictures included a Queen that was partly into a cell laying a egg making her hard to see and also virgin Queens that are only slightly larger than workers.

We were also advised about looking for the signs of having a laying Queen. One photo showed a group of cells with more than one egg in each cell. This normally would indicate the possibility that there are laying workers in there (which is bad because workers only lay drones). However in that slide what we were seeing was a young Queen that hadn't learned to just lay a single egg per cell; a clue to this is that although there were multiple eggs, they were mostly central right at the bottom of the cell, when you have laying workers the eggs are generally closer to the sides due to workers having much shorter abdomens.

There were plenty of other things covered but I either can't remember them enough to write up or I have previously written about the subject anyway so have chosen to leave them out. After the presentation there was, as always, a raffle with prizes including a bottle of wine, chocolates and honey storage buckets, along with other bits. I didn't win anything this month although I really would have liked to get some storage buckets, I only currently have 2 and one contains whats left of my honey and the other contains some honey my dad acquired for me over a year ago. The honey my dad got me has set solid in the bucket and it's this that I'm using to make my mead, when I have more mead making experience I will use honey from my own Bees, or what I like to call "The good stuff"

Thursday 1 December 2011

Apiary visit 28/11/2011

On Monday I did my first apiary visit since 25th October. In the time between then and last Mondays inspection I have been worried about my buzzy little workforce. Things like have they enough food, have they been attacked by wasps or woodpeckers, has the wind blown the hive over etc. have been running through my head.

When I arrived at the allotment I was relieved that the hive hadn't been blown over but there was a distinct lack of activity outside the hive; I watched for about 5 minutes and saw no Bees. When I had suited up I went into the apiary and at that point saw my first Bee of the day entering the hive, I felt reassured for seeing her. The next thing I did was to gently tip the hive to see if it still had any weight to it and was happy that I struggled to lift it one handed; I have read that this is a good test to see if the have sufficient stores. There still wasn't much activity so I put a mouse guard on the entrance. A mouse guard works in a similar way to a Queen excluder in that it provides holes big enough to allow Bees out but not big enough for mice.

After I'd done everything that needed to be done outside the hive I lifted the top off and had a look inside. The fondant that I had put in last time was almost gone so I added another block of it. At this point loads of Bees flew out of the top and started buzzing round me but not too aggressively; some were flying straight at my face but most were just curious. This was a good sight for me as it showed that the hive still had plenty of occupants. As the temperature was dropping at this stage I decided to call it a day and not open the brood chamber. I didn't want to risk them getting too cold and developing any problems in the brood if there was any still present.

A small amount of fondant is visible at the bottom of the tub